Time Machine is a great tool to back-up your Mac, but what if you wanted more control over the backup and the process itself?
Unfortunately Time Machine doesn’t really offer a whole lot of options for users looking to enhance their backups.
In other words, where Time Machine falls short, SuperDuper! picks up the slack.
In this guide I will show you how to use a popular backup application for your Mac provides you with Time Machine-like backups, but with more control and options.
Download and Install SuperDuper!
1. Download the free version of SuperDuper!
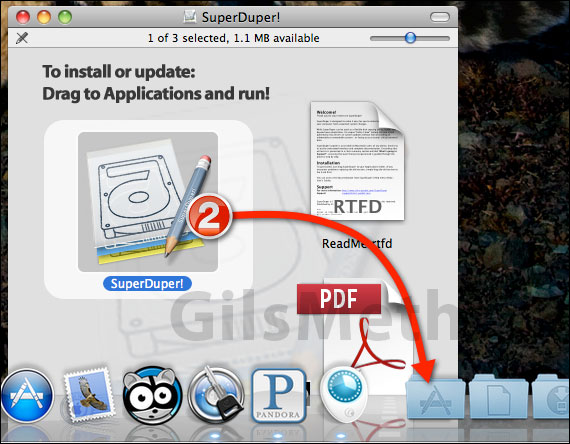
2. When you launch the DMG file simply drag the SuperDuper! Application icon to the Applications folder on your Mac.
SuperDuper! Application Window Overview
Before I show you how to backup your Mac using SuperDuper! we’ll go over the main application window.
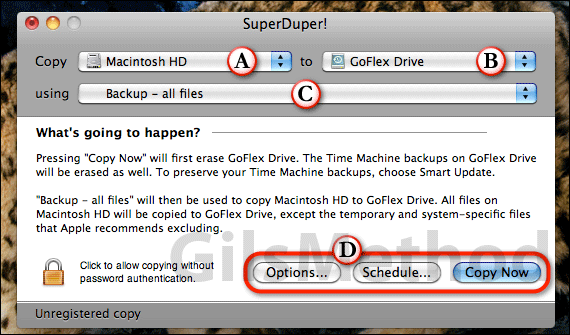
Make a Backup of Your Mac with SuperDuper!
Now that you are familiar with SuperDuper’s interface let’s get started with the a backup of your Mac using this application.
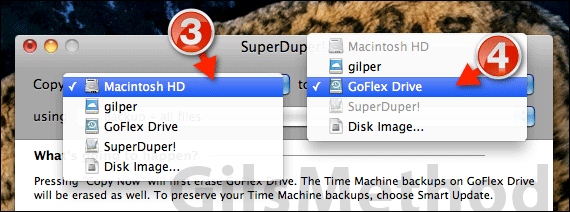
3. Once the application is loaded click the Copy drop-down to select the drive you wish to copy.
4. Now that you’ve selected what you wish to copy you will need to select the destination of the files you are copying.
Click the to drop-down and select one of the available drives or select a Disk Image.
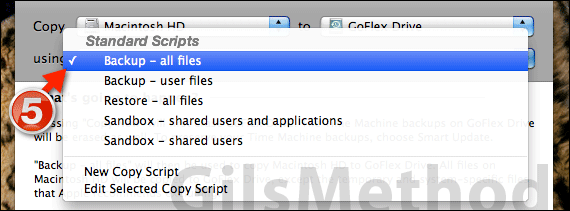
5. The next step is the most important because you will be selecting the script the application will use.
The list of Standard Scripts includes the following:
- Backup – all files
- Backup – user files
- Restore – all files
- Sandbox – shared users and applications
- Sandbox – shared users
For this guide we will focus on backing up all the files so select Backup – all files from the list.
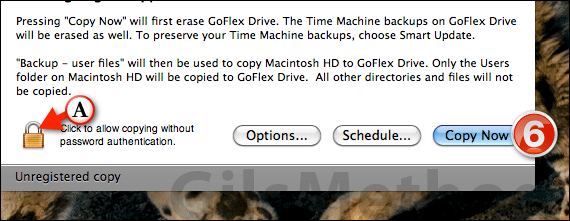
A. If you intend to allow someone else to perform these backups for you and you have not shared the Mac’s admin password you may want to click the padlock to disable password authentication when files are backed up.
Warning: If you have Time Machine backups on the destination drive and chose the Backup – all files script, the hard drive will be erased and those Time Machine backups will be deleted.
6. Click Copy Now to begin the backup process.
The duration of the backup process will depend on your Mac’s specifications, the amount of files you are backing up and other tasks being performed on the Mac during the backup process.
If you have any comments or questions please use the comments form below.
Software/Hardware used: Mac OS 10.6.8 and SuperDuper! 2.6.3.


