The guide below is great for those of you who would like to create the reflection effect for logos and text in Photoshop. This effect has been seen a lot with the rise of Web 2.0 in websites and web applications. I’ve setup this tutorial with a sample logo I created so I am assuming that you have a logo or text file to work with. If you have any comments or questions, please post them below.
Note: I used Photoshop CS3 to create this tutorial, however these steps should be similar in other versions of Photoshop. If the text used aligns with the bottom edge of your logo you may encounter problems with the way your reflections look. If you intend on aligning text with the bottom edge of the logo be careful with letters like g, j, p, q, and y; if used as lower-case letters they will "stick out" below the edge. (See examples at the end of the article)
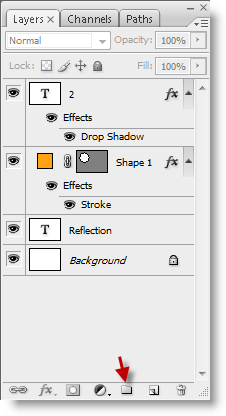
1. Create a New Folder in the Layers Panel, we do this to group all of the layers that make up your logo.
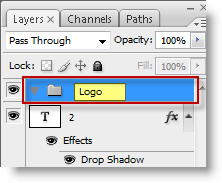
2. Rename the folder you just created so to make sure you can identify it.

3. Select and drag the layers that make up your logo into the Logo folder you just created.
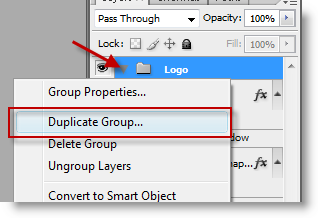
4. Right-click the logo folder you just created and select Duplicate Group from the menu.
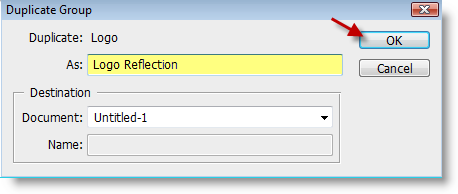
5. Name the duplicate folder Reflection (You can name it what you like, I suggest to include reflection so that you can identify it). Click OK.
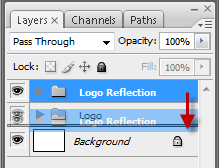
6. The folder you duplicated will most likely appear above the original folder containing your layers, if this is the case, select and drag the reflection below the original logo file.
Note: Be careful not to place the folder inside the other folder, if this happens just select and drag it outside the folder. The reason for placing the reflection folder below the original is to ensure the top layer overlaps the lower layer.
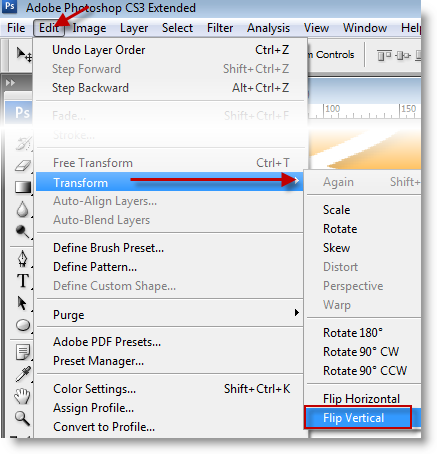
7. Make sure the reflection layer folder is selected and click on Edit > Transform > Flip Vertical (this will flip the layer on the vertical axis, it will place it upside down).
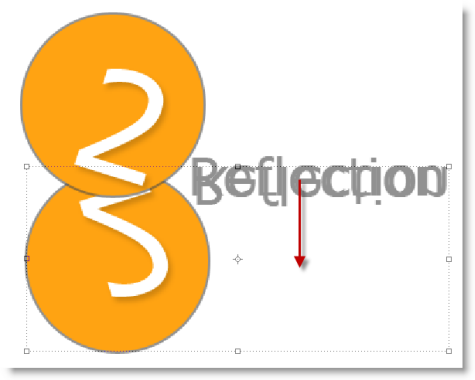
8. After you flip the layer you need to drag the flipped layer below the first layer (make sure not to drag it in the layers panel, you’ve already done this). Align it so that the bottom of the top logo is touching the top of the bottom logo (or the bottom since it’s flipped). (See above)
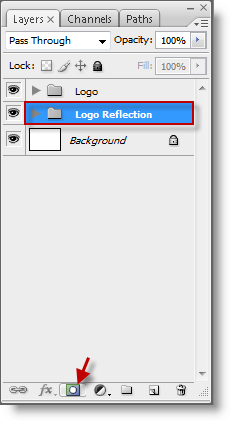
9. Go back to the layers panel and click on the Logo Reflection layer, click on the add layer mask button to create a layer mask.
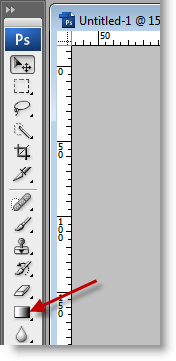
10. Select the Gradient Tool from the Tool panel.

11. This next step is going to require several attempts so that you get the right reflection effect you want. Click on the an area slightly above the logo above (green dot of the arrow) and drag down to the area slightly above (the end of the arrow tip) the lower logo. Use the screenshot above as reference.

12. The screenshot above is an example of your logo/text should look. The original layer above the flipped reflection layer that slightly fades out.
Example of issue with lower-case letters
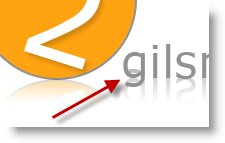
The g from the both layers overlap.

I used a Capital G and the problem is resolved.
There are other ways of handling the overlap issue; changing the design, not using text, using all caps, etc. If you would like to share any ideas please do so below.
