Every time you type www.GilsMethod.com Windows sends a request to your internet provider’s nameserver, these servers then respond with an address like 109.239.146.34 (which is the true address format for all servers). Using this information your browser can now download the information stored on the server (the website you’re visiting) so that it can be displayed on your browser window. Simply put your computer and the servers you are visiting understand the 192.168.1.1 format, but since we cannot remember the IP address for all servers, we use easy to remember domain names, GilsMethod.com, Microsoft.com, Lifehacker.com and so on. The Domain Naming System servers match the machine address 192.168.1.1 (example) to the domain name GilsMethod.com.
The guide below will show you how to add a series of registry entries that will increase the size of your computer’s DNS (Domain Naming System) cache, this allows your computer to lessen the number of trips (queries) it makes in order to get the IP address to the websites you are visiting, which will improve your browsing performance. If you have any comments or questions, post them below.
NOTE: Please back up your registry before proceeding with the steps below. How to Backup Your Registry
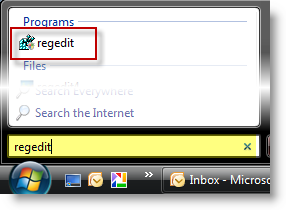
1. Click Start (Windows logo) and type regedit in the Windows Search bar, regedit should be the first search result. Click to open the regedit icon.
Note: If you have UAC (User Account Control) enabled, click Continue to allow Registry Editor to open.
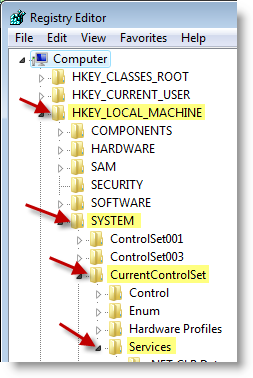
2.With the Registry Editor open browse to the following location: HKEY_LOCAL_MACHINE > SYSTEM > CurrentControlSet > Services
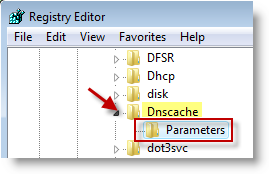
3. Browse to Dnscache > Paramenters (click on Paremeters)
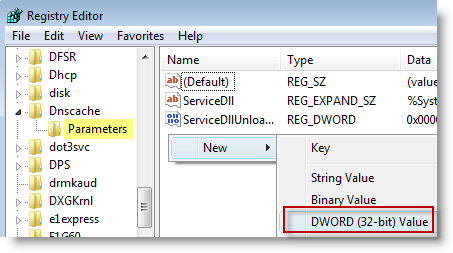
4. Right-click on the white space located on the pane to the right, select New > DWORD value
Note: Step #4 will be repeated 3 more times to create 3 additional DWORD values
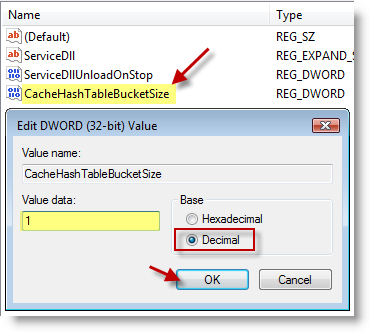
5. Name the value CacheHashTableBucketSize, double-click the entry you just created and select Decimal under Base, type 1 for Value data and click OK
Note: Make sure to select Decimal for all the entries and that the spelling for the DWORD values is accurate including caps, etc.
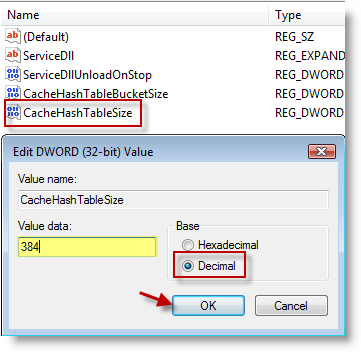
6. Right-click on the white space located on the pane to the right, select New > DWORD value, Name the value CacheHashTableSize, double-click the entry you just created and select Decimal under Base, type 384 for Value data and click OK
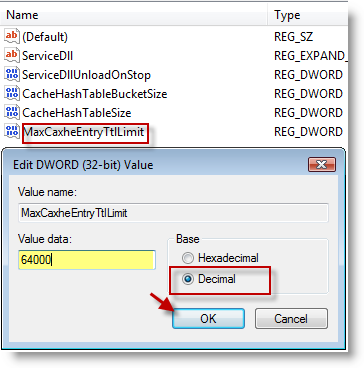
Note: The screenshot above contains a typo – MaxCaxheEntryTtlLimit should be MaxCacheEntryTtlLimit – Thanks to ctm and Elton for catching this.
7. Right-click on the white space located on the pane to the right, select New > DWORD value, Name the value MaxCacheEntryTtlLimit, double-click the entry you just created and select Decimal under Base, type 64000 for Value data and click OK
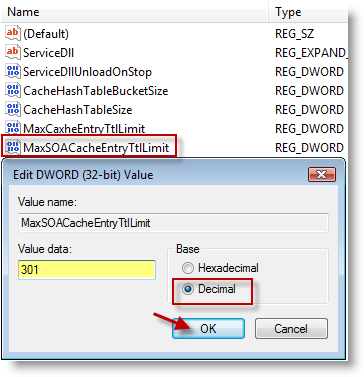
8. Right-click on the white space located on the pane to the right, select New > DWORD value, Name the value MaxSOACacheEntryTtlLimit, double-click the entry you just created and select Decimal under Base, type 301 for Value data and click OK
9. Restart your computer.
Article source Windows Vista Annoyances: Tips, Secrets, and Hacks

