As a new father, Dragon Naturally Speaking has become my best friend. While holding the baby I am able to dictate the text for the posts you’ve seen the past couple of weeks on this blog. While I’m away from my home computer an my Yeti Mic I have no way of dictating text so that it is automatically transcribed for me, so I started thinking about buying a voice recorder and then realized that the iPhone has a Voice Memo App that will allow me to make recordings that can be retrieved at a later date.
I promptly started recording voice memos for articles, ideas, notes, and anything I could come up with, I was loving it. However I quickly found two problems, the first was that the voice memos created on the iPhone do not automatically sync to the iTunes library, the second was that the format used by the iPhone when the voice memos are created (.M4A audio format) is not supported by Dragon.
After some tinkering I found solutions to both those problems and was able to have the Voice Memos transcribed by Dragon Naturally Speaking. The guide below is a compilation of all the steps necessary to get voice memos from your iPhone transcribed by Dragon to your computer without you having to type a single word.
If you have any comments or questions or know of a better way to do this please post them below.
Note: I used iTunes 9.0.2 with an iPhone 3GS and Dragon Naturally Speaking 10
Get Voice Memos Ready for Transcription
Before you can transcribe the Voice Memos you will have to sync them to your iTunes library and then convert them to a format recognized by Dragon Naturally Speaking. The links below are to guides that will walk you through the syncing and conversion of the voice memos. Both links will open in a separate window/tab so that you can return to this page when you are done with those instructions.
1. First you need to Synchronize iPhone/iPod Touch Voice Memos with the iTunes Library
2. Once you’ve got your Voice Memos on your computer you need to Convert them from M4A format to the MP3 format recognized by Dragon.
Transcribe Your Voice Memos
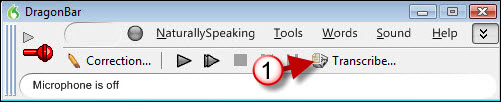
1. Open the DragonBar and click on the Transcribe button.

2. The Transcribe from… dialog box will open, click on Browse to locate the file.
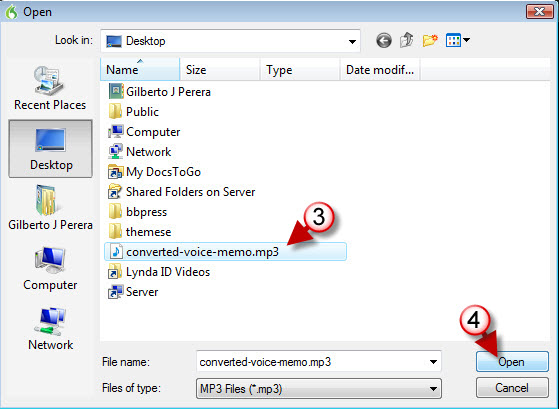
3. Locate and click on the audio file you wish to transcribe. If this is a Voice Memo from an iPhone and you followed the instructions on converting Voice Memos above the file should be an MP3 file.
4. Click on the Open button to proceed.
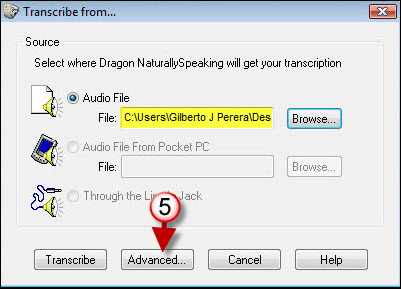
5. You will be brought back to the Transcribe from… dialog box. Click on the Advanced button to customize the transcription.
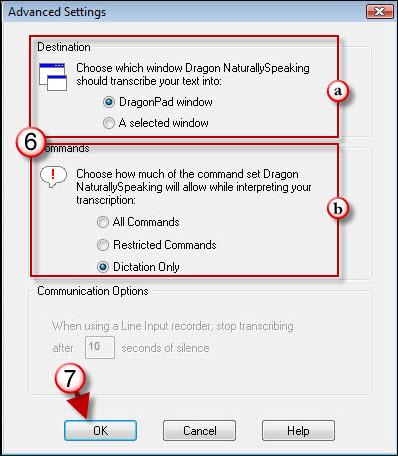
6. In the Advanced Settings dialog box you are provided with 3 settings to customize;
a. Choosing a Destination specifies where the transcribed text will be entered to, the options are the DragonPad window or A selected window. I usually stick to the DragonPad window and paste the contents to Word.
b. Dragon supports the use of commands during dictation so if you used commands throughout your recording make sure to select either All Commands or Restricted Commands, Dragon understands them as such – since I don’t use commands for transcripts I chose Dictation Only.
Since we are recording from an audio file the Communications Options is grayed out and will not be discussed in this tutorial.
7. Once you have made your choices, click OK to proceed.
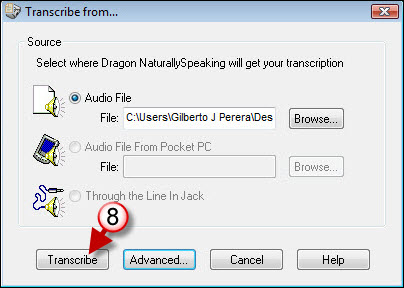
8. When you are ready, click on the Transcribe button to begin transcription.
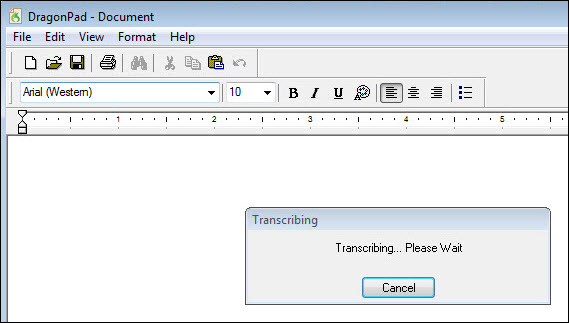
Transcription in progress…
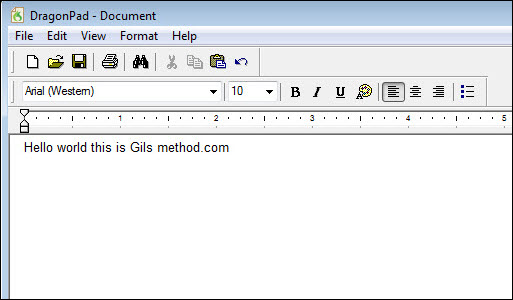
Voila! The Voice Memo from your iPhone has been transcribed!
