 At work all of our computers have designated network drives that are used by numerous applications that require connections to them. I found that whenever I plugged in my memory key, it used a drive letter which was already occupied by a network drive. The result was that the network key was unaccesible, but dont worry there is a solution. You have to enter your computers drive management console and change drive letters, you need to do this once for every memory key you wish to use on that computer. Follow the steps below or you can click the pic tutorial icon above to view a visual step-by-step. As always comments/suggestions are always welcome.
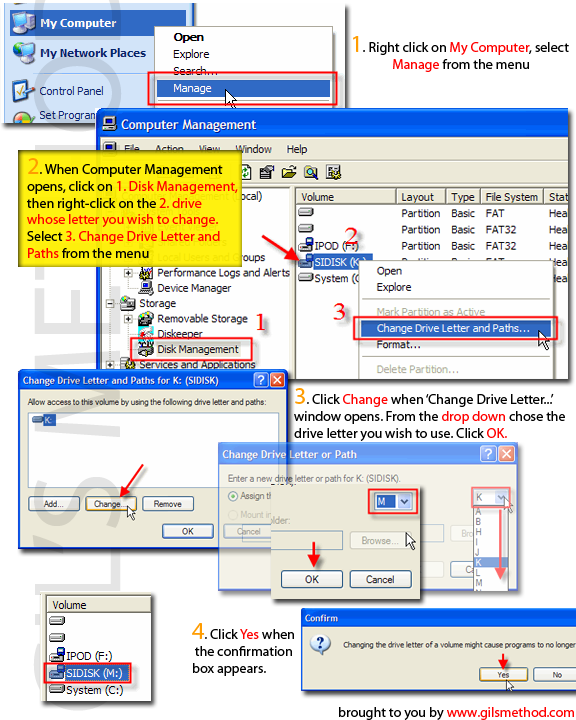
1. Right-click My Computer and select Manage from the drop down menu
2. Under Storage select Disk Management, the pane to the right will display all the drives installed on your computer.
3. Right-click the drive whose drive letter you wish to change, select Change Drive Letter and Paths from the menu
4. A window will open, click Change then another window will open with a drop down box that allows you to select a drive letter. Try to select a drive letter which is not in use.
5. Click OK, then a confirmation box will appear, click Yes (that you wish to continue) and you’re done.
6. Your drive should now have the designated drive letter and become accesible (if for some reason it is still not accessible make sure drive letter is not in use.)
