One of my favorite and frequently used toolbars is the Quick Access Toolbar located above the Office Ribbon. By default the toolbar has shortcuts for the Save, Undo, and Redo commands, fortunately Microsoft likes to make our lives easier and allowed users to customize this easy to access toolbar. The how-to below will walk you through the steps necessary to add some commonly used commands as well as those that are not so common to Excel’s Quick Access Toolbar.
If you have any comments or questions please post them below.
Note: I used Excel 2007 when creating this tutorial.
Customize the Quick Access Toolbar
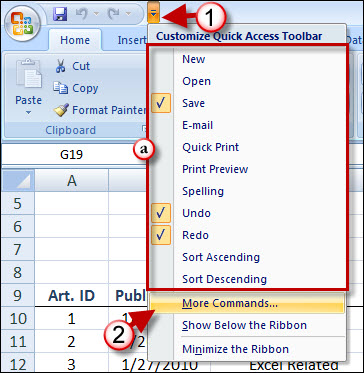
1. Click where the arrow indicates to open the menu.
a. You will notice that there are several commands you can readily choose from the list to add to the Quick Access Toolbar. Proceed to the next step to show you how to access and include additional commands not listed here.
2. Click on More Commands from the menu.
Note: This menu allows you to show/hide the Ribbon and to change its location.
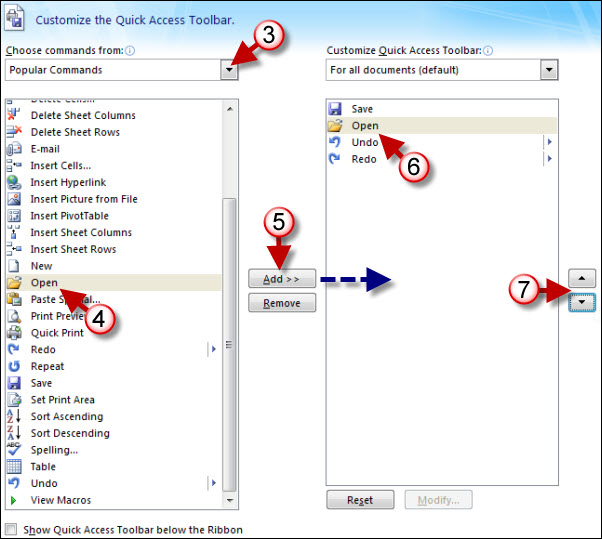
3. Choose a Command category from the drop-down menu.
4. Choose the command you wish to appear in the Quick Access Toolbar.
5. Click on the Add button to add the selected command to the Quick Access Toolbar.
Note: If you change your mind about the addition you made or would like to remove some of the existing commands and choose the command you wish to use in the Quick Access Toolbar.
6. You can customize the order in which the commands appear in the Quick Access Toolbar. Click on the command you wish to move.
7. Use the arrows located on the right to move the position of the selected item.

8. Click on OK when you are done customizing the toolbar.

The example above illustrates what the Quick Access Toolbar looks after adding the Open shortcut to the toolbar.
