If you use Windows Live Photo Gallery to manage all of your photos you will love one of the newest features introduced in the latest version of this powerful photo management application. You can now upload photos to your Facebook account with the click of a button. You have the option of uploading a single image or an entire album, the choice is yours.
The guide below will show you how to upload pictures to Facebook with Windows Photo Gallery. If you have any comments or questions please use the comments form at the end of the guide.
Upload Pictures to Facebook in Windows Live Photo Gallery 2011

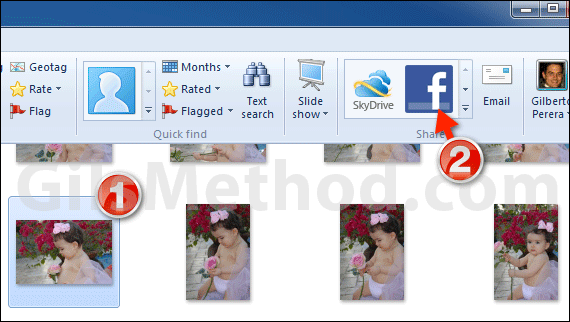
1. Select the image or group of images you wish to upload to Facebook.
2. Click on the Facebook icon in the Share group on the Ribbon.
Note: If you wish to upload a group of images to a different folders you will need to do it one folder at a time.

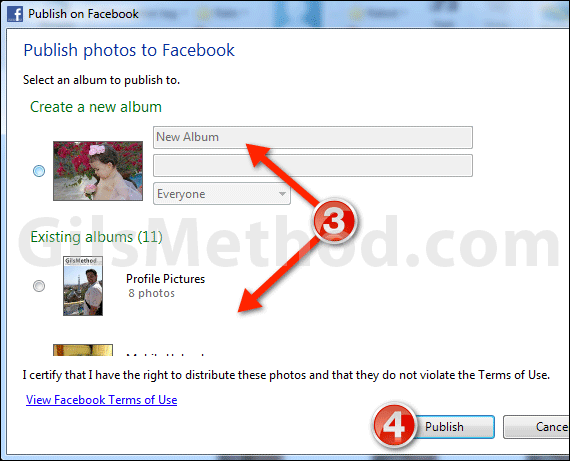
3. The Publish on Facebook window will open. You will have two options when publishing to Facebook. The first allows you to create a new album in Facebook so the selected pictures appear in the new album. If you choose this option enter the details about the album in the corresponding boxes. You can also specify the sharing criteria from this window.
The second option allows you to upload the selected pictures to an existing Facebook album.
4. Click Publish when you are ready to upload your pictures to Facebook.

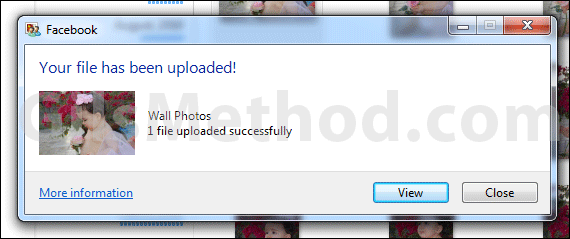
The picture(s) will upload right away. When the upload is complete you will see the message above with the option of viewing the picture(s) uploaded online. Click on the View button if you wish to view the pictures online or click Close to continue working with Windows Photo Gallery.


