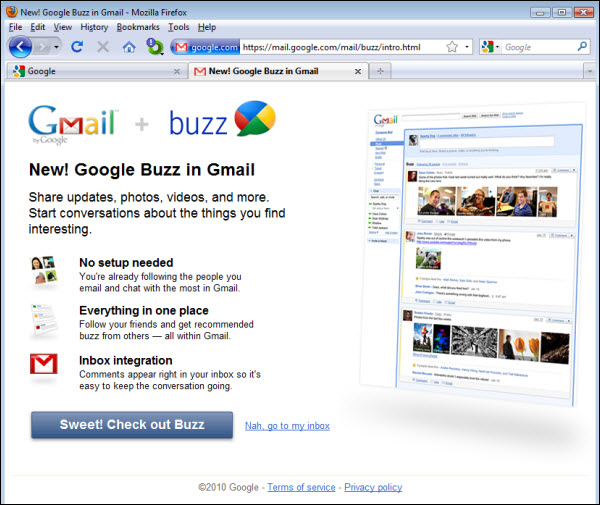
If you’re all buzzed out or have privacy concerns like some friends that have contacted me today, then this how-to is for you. When Google introduced Buzz yesterday, Gmail users that logged on to check their email were faced with a splash screen (pictured below) which gave provided them with two options; the first a large button labeled, "Sweet! Check out Buzz" or a small link to the right of the button titled, "Nah, go to my inbox."
If you are like most users you probably clicked on the Sweet! Check out Buzz button out of curiosity. When you arrive to the Buzz page (now a part of your Gmail) you probably were shoved into a world of updates and lists of friends and people you didn’t know you were connected to…so you were probably confused. If you’ve played with Google Buzz and prefer to stick to Facebook or Twitter, Google was kind enough to allow you to disable this new feature. Follow the instructions below to disable or enable Google Buzz for Gmail.
I am providing you with two venues for this how-to, the first is a video I uploaded to YouTube, the second, located directly below the video is a regular step-by-step how-to with screenshots. If you have any comments or questions please post them below.
How to Disable Google Buzz – YouTube Video
How to Disable Google Buzz – Step-by-step Guide
If you don’t feel like watching the video or the pace of the video is too fast to follow (I’m working on that) you can go at your pace with the step-by-step tutorial below.
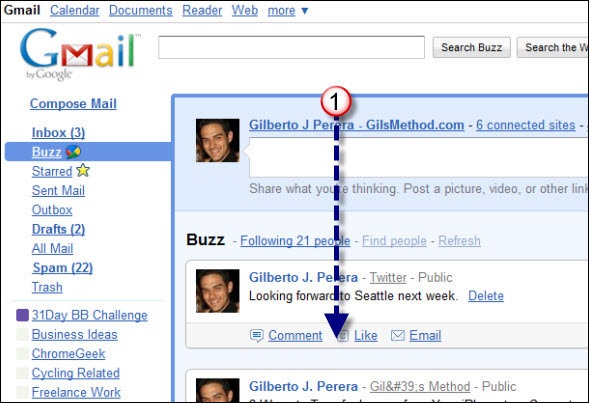
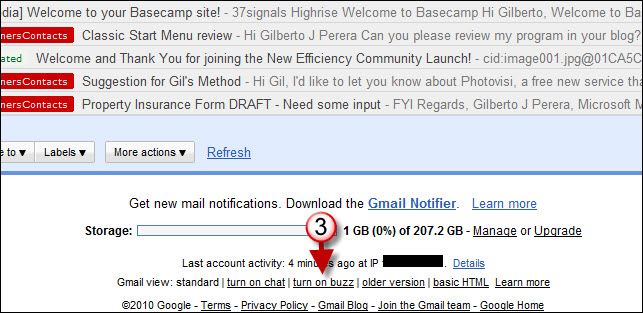
1. With Gmail open, scroll to the bottom of the page.
Note: You don’t need to be on Buzz to do this, just make sure you have Gmail open.
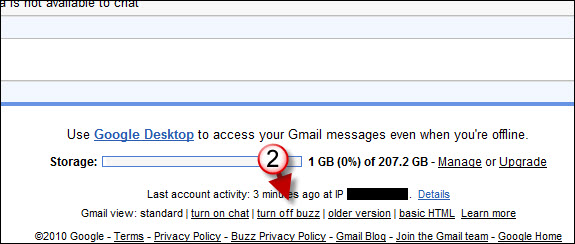
2. When you reach the bottom/footer of the page, locate the turn off buzz link and click on it.
The Gmail window will now reload.
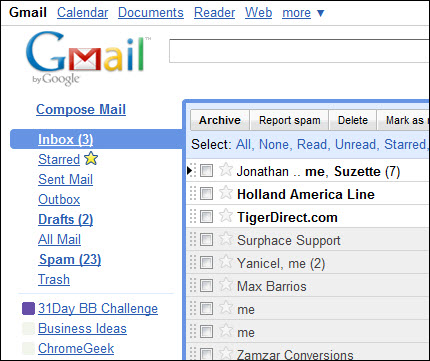
When Gmail reloads you will notice that the buzz link is gone from the left pane. If it’s still there you might need to close and reopen your browser window.
3. If you wish to re-enable Google Buzz, then scroll to the bottom of the window as we did in Step 1 and click on the turn on buzz link.
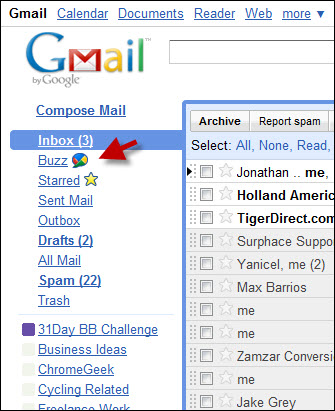
When the Gmail page reloads you will notice that the Buzz icon is back in its place below the Inbox link. If Buzz does not appear after enabling it, you may need to close and reopen your browser window.
