Time Machine is a native backup solution that ships with every Mac. You will most likely encounter Time Machine when plug-in an external hard drive to your Mac or in your Applications folder. In this guide I will show you how to configure Time Machine to make sure you keep a fresh backup of your Mac’s contents in the event of data loss.
Software/Hardware used: Mac OS 10.6 running Time Machine and a Seagate External hard drive. Make sure you use a hard drive whose size is equal or greater than the Mac’s hard drive.
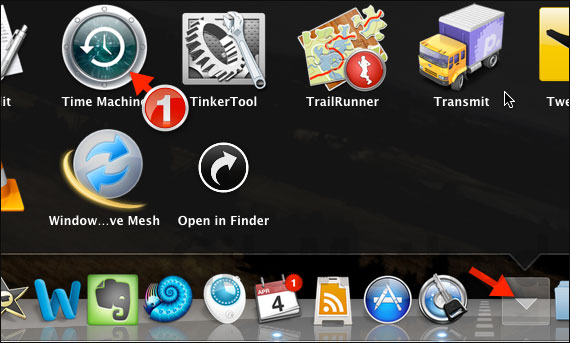
1. Click to open the Applications folder and click Time Machine from the list.
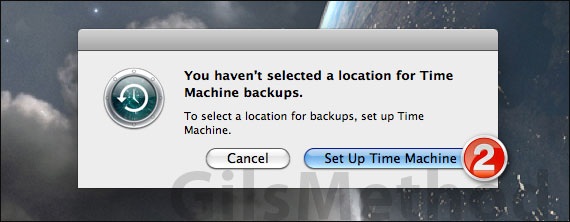
2. You will be prompted to select a location for the backup if you haven’t done so already, click Set Up Time Machine to continue.
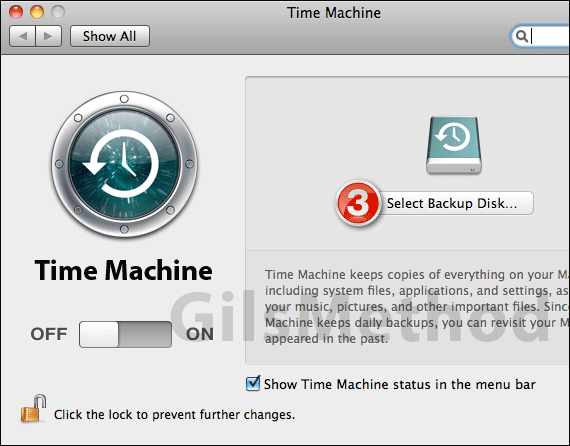
3. When Time Machine opens, click Select Backup Disk…
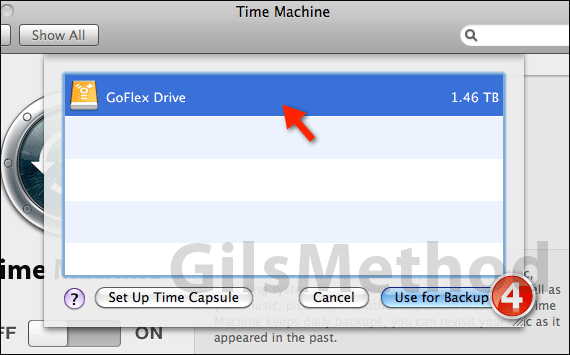
4. A list of Available and compatible drives will appear, click the drive you wish to use and click Use for Backup.
Note: If you are using a Time Capsule click Set Up Time Capsule instead.
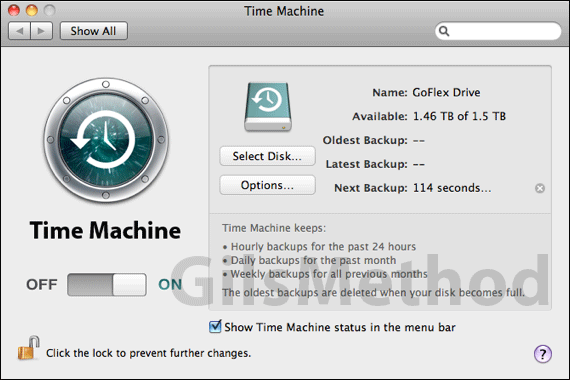
Once the drive is selected, the Time Machine status will be set to ON and a backup will be created of your Mac on the drive you selected.

When the backup begins you will see a status indicator above showing you the progress of the backup. Click to minimize the window so you can continue working on your Mac.
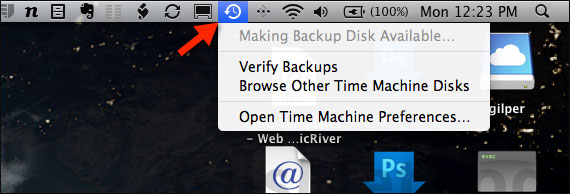
You can also check on the status of your backup by clicking the Time Machine icon in the menu bar. From this menu you can also access backups and Time Machine preferences. Once the backup is complete, Time Machine will continuously back up your Mac and keep a backup on the following schedule:
- Hourly backups for the past 24 hours
- Daily backups for the past month
- Weekly backups for all previous months
If you have any comments or questions please use the comments form below.


