If you are big on customizing the look of Windows 7 and want to learn how to change the fonts for every element in the operating system, then read the instructions below. Windows provides users with the freedom to customize the fonts throughout the operating systems interface. You can change the font size, the font, color, and style. The how-to below will show you where the options menu can be found and the options available to you.
If you have any comments please post them below or if you have any questions visit our forums.
Note: I used Windows 7 Ultimate in this tutorial.
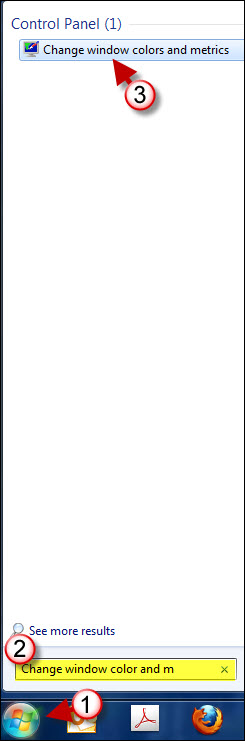
1. Click on the Orb to open the Start Menu.
2. Type – Change window color and metrics in the Search Box.
3. Click on the Change window color and metrics icon in the search results under Control Panel
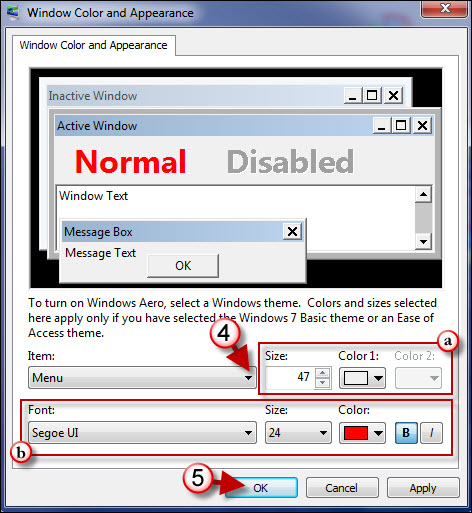
4. In order to customize a specific item you must first select it from the Item list. Select the item you wish to modify.
a. Choose the Size and Colors for the selected item (this is not the font size)
b. Choose the Font, Size, Color, and Style for the font of the chosen item.
Note: If an option is grayed out it is not available for the item that was chosen.
5. Click OK when you are done.
 ‘
‘
The example above illustrates the changes made to the font of the menu items in Windows Explorer.
