After hours of video editing you have finally completed your masterpiece in iMovie. You are ready to share it with family and friends with a DVD, but don’t know how to create one with iMovie.
Don’t worry with this guide we have you covered. However there’s one thing you should know. iMovie doesn’t actually create the DVD, there’s another iLife application that does that, iDVD.
All iMovie does is render and prepare your final movie so that iDVD can grab it and create a DVD with it. So if you’re looking to bring your movie to a DVD make sure to follow the instructions below.
Software/Hardware used: iMovie ’11 and iDVD ’11 running on Mac OS 10.6.7.
How to Create a DVD in iDVD from iMovie
Prepare the Movie in iMovie
You will use iMovie for the first part of this guide.

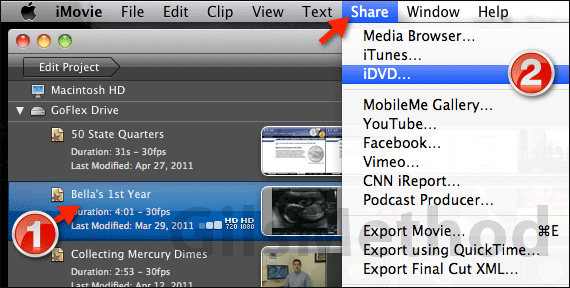
1. In iMovie click on the Project you wish to burn to DVD.
2. Click Share and then iDVD from the menu.

iMovie will prepare the project in a format that iDVD will be able to use. iDVD should open when the process is complete.
Customize and Burn the DVD in iDVD
The following section is in iDVD that should have opened in the previous step.

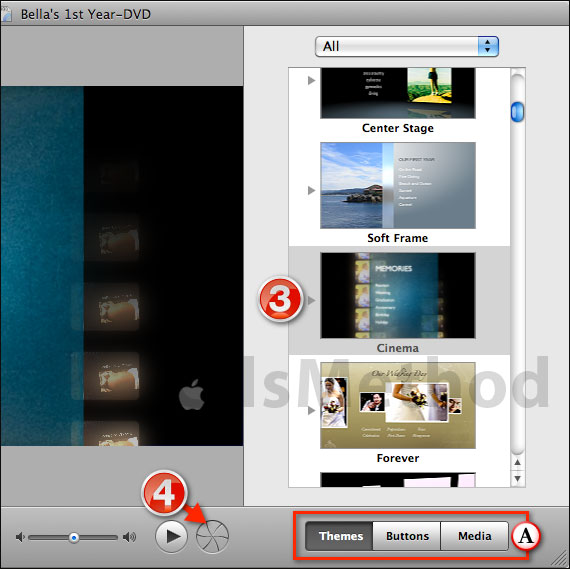
3. Select a theme to customize the movie’s DVD menu.
A. You can also add Buttons and other Media to the menu.
Note: iDVD has an extensive list of features and options that will not be covered in this guide, but will be covered in other iDVD tutorials.
4. When you are ready to the burn the movie to DVD, click the Burn iDVD Project button.

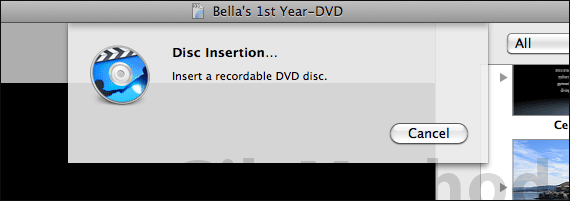
If you have not done so already, insert a blank DVD when prompted. The DVD and menu system you selected will be rendered before burning the movie.
Process time may vary depending on the length of the DVD and the speed of your Mac. When complete you should be able to play the DVD on stand-alone DVD players.
If you have any comments or questions please use the comments form below.


