If you use Picasa you may find that it is littered with features all around. So many features are included that one may not be able to grasp their use or take the time to understand how they work. I’m writing this article in response to my fathers request to help him send pictures via email. I’ve setup Picasa on his computer so following this guide should help him and others effortlessly send pictures via email. This guide also helps because when he forgets how to do it all he has to do is come to my website and follow the simple steps. If you have any questions or comments please post them below.
Note: I used Picasa 3 for this tutorial
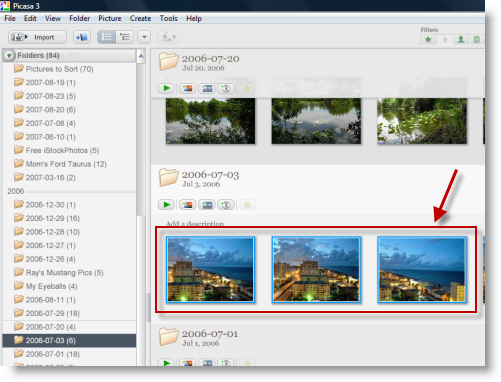
1. First you must select the pictures you wish to email. You can drag a box around the pictures or select individual pictures by holding the CTRL key (on your keyboard) as you select pictures individually.
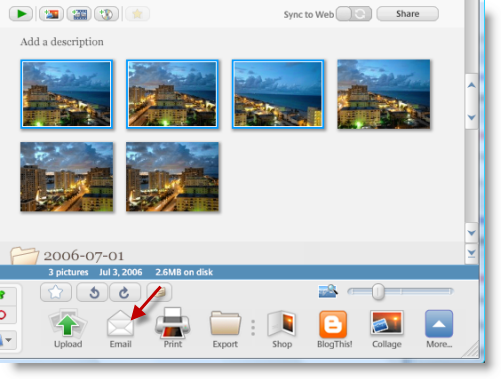
2. Once you’ve selected the pictures you wish to email, click on the Email button located at the bottom of the screen (look for the small envelope icon)
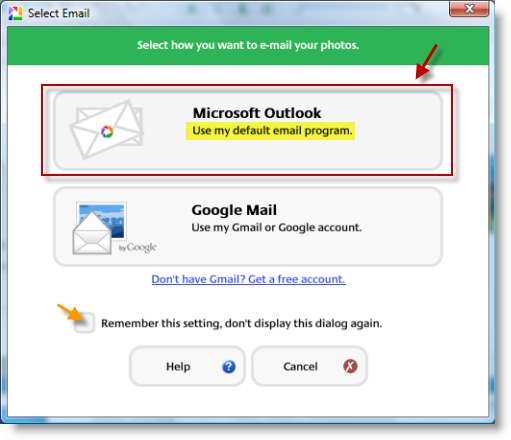
3. A Select Email box will open. If you use an Email program like Outlook or Thunderbird, click on the Microsoft Outlook button (it may say Thunderbird).
Note: To skip this step in the future add a checkmark to the Remember this setting, don’t display this dialog again checkbox.
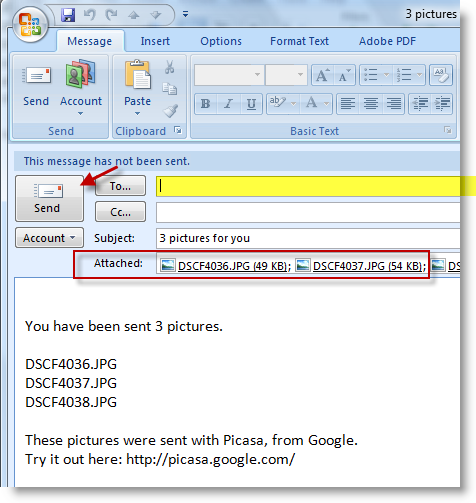
4. A new email message should open, type the email of the recipients, add your message, and click the Send button to send your pictures.
Note: Beneath the subject line, the Attached pictures will appear.
