If you’re new to Pages on the iPad chances are that you are not familiar with the tools and options available to edit documents. This will be part of a set of articles that will help new iPad users become familiar with Pages.
In this guide I will show you how to add images from your iPad’s Photo Albums to a document in Pages for the iPad.
Software/Hardware used: iPad 2 running iOS 4.3.

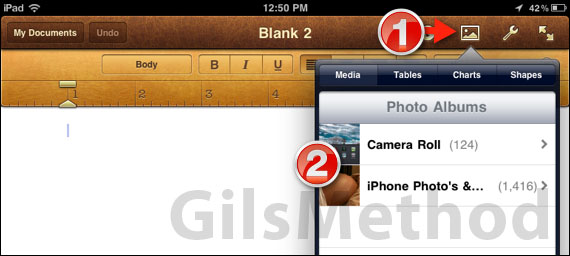
1. Tap the Add Media icon [small picture] on the top-right corner.
2. Make sure that Media is selected and tap the Album where the photo you wish to add is located.

3. Tap to add the image you wish to add to the document.
Note: If the image is not added right away, give Pages a few seconds to process it. I’ve found that with larger images Pages may take a second or two before the image appears on the document. If you tap the image more than once, Pages will add multiple instances of the images.

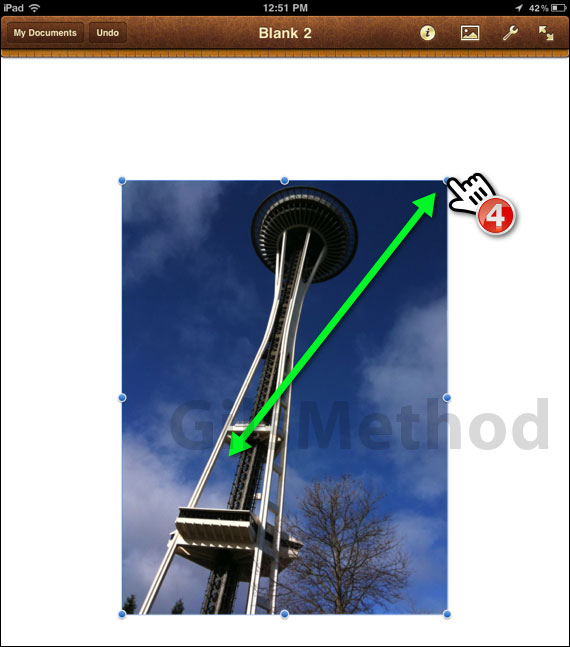
4. Once the image has been added to the document, you can use the handles found at each corner and side of the image to resize it to your needs. To resize, tap and drag the handles.

A/B. If you tap on the image a second time you will see a small pop over with four options:
- Cut – Cuts the image from the document and makes it accessible to another document.
- Copy – Makes a copy of the existing image which can be used elsewhere in the document.
- Delete – Removes the image from the document.
- Replace… – Used to replace the existing image with another from your iPad.
Now that you know how to add, edit and remove images in Pages, do you have any comments or questions?


