
I recently purchased a new PC and decided to move my entire Lightroom catalog over to the new computer. I attempted to use the Export catalog function, but it kept failing over and over again (wonder if it had to do with volume of pictures) either way I decided to this manually, so I copied all of the files over to the new PC and opened the catalog – it seemed that everything was fine until I opened one of the pictures. The previews loaded, but the original file could not be found (I changed the relative directory of the files) I did a little digging in Adobe’s help online and discovered that you can tell Lightroom where to look for your missing files. The guide below will walk you through the process of locating individual files as well as folders and hopefully save you the time of trying to figure this out.. If you have any comments or questions please post them below.
Note: I used Lightroom 2 for this tutorial.
Locating Missing Files in Lightroom
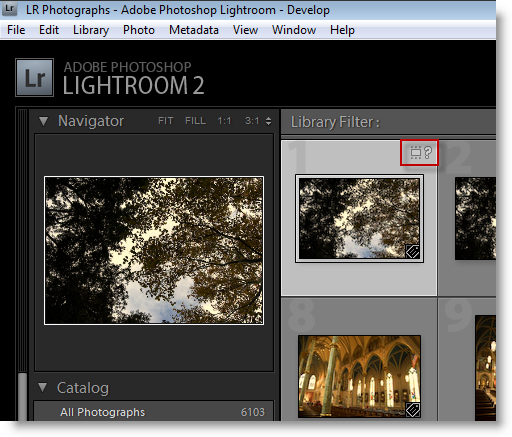
1. With Lightroom open, click on the picture that is missing (when a picture is missing the icon highlighted above will appear on the top right corner of the picture), click on this small icon to bring up the Locate dialog box below.
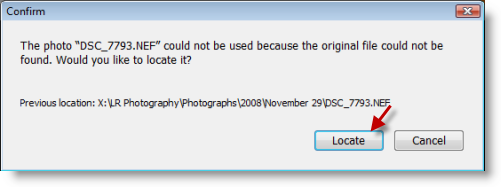
2. Click on the Locate button to find your picture.
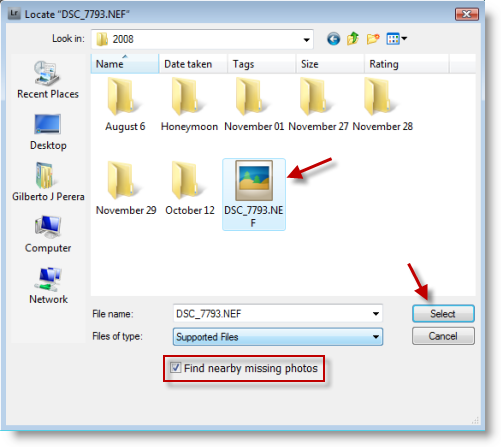
3. Browse to the directory that your file is located, select it and click the Select button.
Note: Add a checkmark to the Find nearby missing photos checkbox to locate missing pictures within that same directory.
Locating Missing Folders in Lightroom

1. When a folder is missing in Lightroom, the folder will be grayed out and a question mark will appear next to the folder.
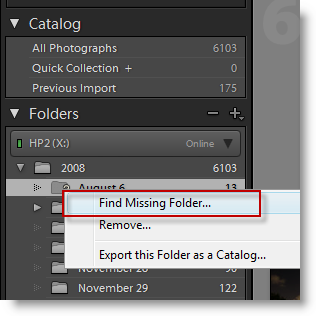
2. Right-click on the missing folder and click on Find Missing Folder… from the menu
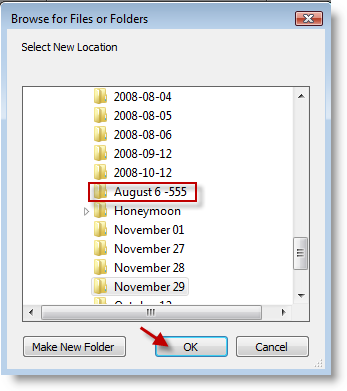
3. Browse to locate the missing folder, select it and click OK.
Your files should now be in order.
