Who says you need iMovie for basic video editing when you have QuickTime Player? Last week I showed you how to create a screencast with QuickTime Player and in this follow-up post I will show you how to trim a video with QuickTime Player on your Mac. Any video can be edited so long as it is decrypted and it is in a format supported by QuickTime Player.
The guide below assumes that you have a video to work with. If you have any comments or questions please use the comments form below.
Software/Hardware used: QuickTime Player 10 running on Mac OS 10.6.

1. Click File then Open File from the menu.

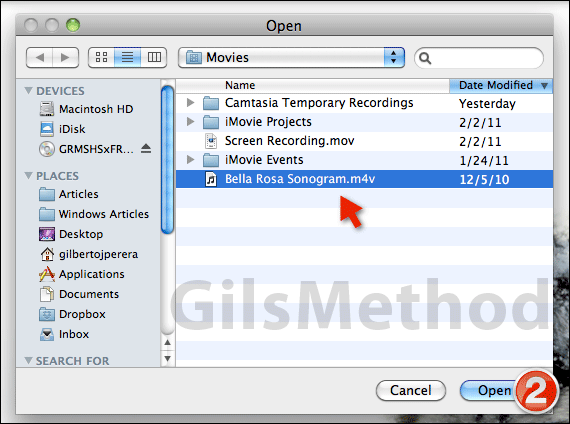
2. Select the file you wish to edit and click Open.
Note: You may notice that some of the video files you are using may appear greyed out, if this is the case, then the file is not compatible with QuickTime Player and it cannot be opened or edited with QuickTime. You may want to use a file conversion application to change the format used by the video.

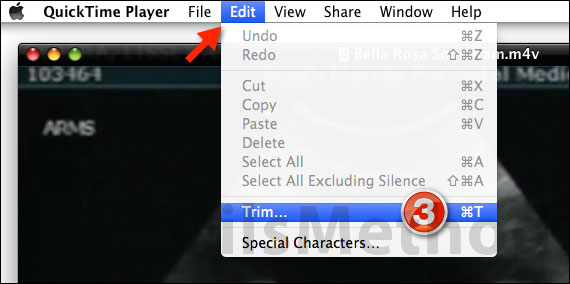
3. When the video opens, click Edit in the Menu bar then Trim.

4. You will notice that the Trim bar will appear. You have two handles at each end of the clip’s timeline which can be used to shorten the clip from either end. Slide handles A and B to the desired location of the timeline. The video within these two handles will be the final vide.
When you are done, click Trim to edit the video.

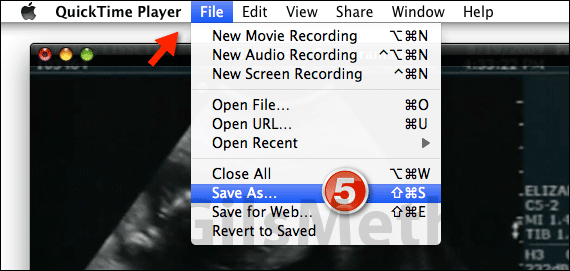
5. If you are satisfied with the end product, it’s time to save the new trimmed video. Click File then Save As from the menu.
Select a destination and name the file, click Save. You have successfully trimmed a video with QuickTime Player.


