One of the problems with Vista’s default Virtual Settings is that the swap file size is variable meaning, that it grows and shrink with use, which in turn causes the virtual drive to become fragmented. Fragmentation translates to slower read/write times for the files loaded on the swap file. [Page/swap file and Virtual Memory are synonymous]. The instructions below will describe the process necessary to set the page file size in Windows Vista to constant. If you have any comments or questions post them below.
Note: Before proceeding please close all open programs as the changes made in this tutorial may require you to restart your compute. The tutorial was created using Vista Ultimate 64-bit, but should be the same on all Vista versions.
Setting Page File Size
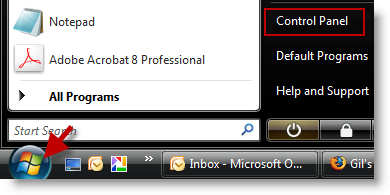
1. Click Start (Windows logo) > Control Panel
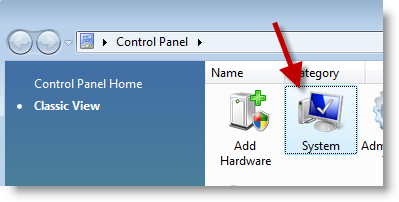
2. When the Control Panel window opens, find the System icon and double-click to open
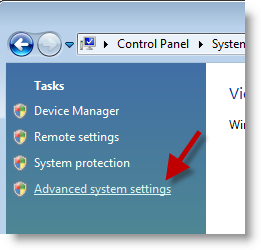
3. Click on the Advanced system settings link located on the left pane
Note: If you have UAC (User Account Control) enabled, just click to Allow so that you can proceed.
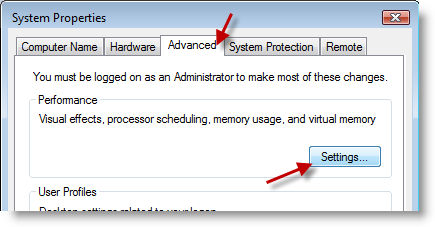
4. Click on the Advanced tab in the System Properties dialog box and click on the Settings button below Performance.
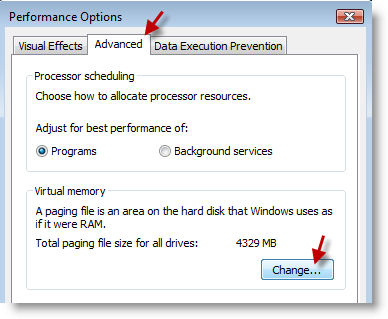
5. Click on the Advanced tab in the Performance Options dialog box and click on the Change button below Virtual Memory
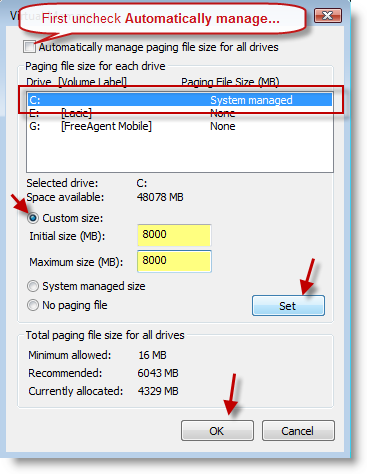
6. Uncheck the "Automatically manage paging file…" checkbox, select the Drive where you want your Virtual Disk to be located. Click on the Custom size: radio button and set the Virtual Memory size desired (see note below), you must click Set for the change to take place.
Note: The recommended size is usually 2-3 times your physical RAM size, so if you have 2GB of RAM, the recommendation is 4GB-6GB. Results will vary based on the type of work you do on your computer, you should try several settings until you find the one that works for you. You will also notice that the Operating System recommends a setting – look at the value next to Recommended. "Ideally" the Virtual Drive should be located on a drive other than the one that the Vista installation is located, if this is not possible then just leave it on your C: drive.
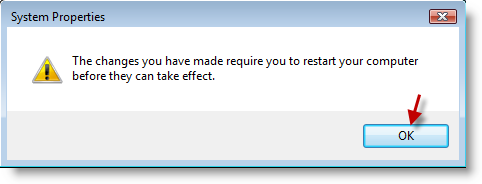
7. The changes you just made will probably require a Restart, click OK.
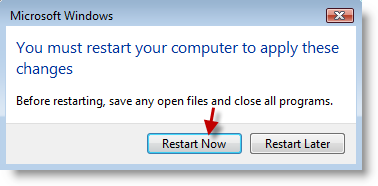
8. Click Restart Now
Memory logo via Iconfinder.com
Article source Windows Vista Annoyances: Tips, Secrets, and Hacks

