Did you create a HomeGroup on your network, but don’t know how to join your other computers to the HomeGroup? In this guide I will walk you through the steps necessary to add a Windows 7 computer to an existing HomeGroup in your network. Before proceeding with this guide make sure that at least one HomeGroup computer is one so that you can join its HomeGroup. You will need the HomeGroup password in order to join the HomeGroup so make sure you have that handy. If you have any comments or questions please use the comments form at the end of the article.
Software used: Windows 7 Ultimate.
How to Join an Existing HomeGroup

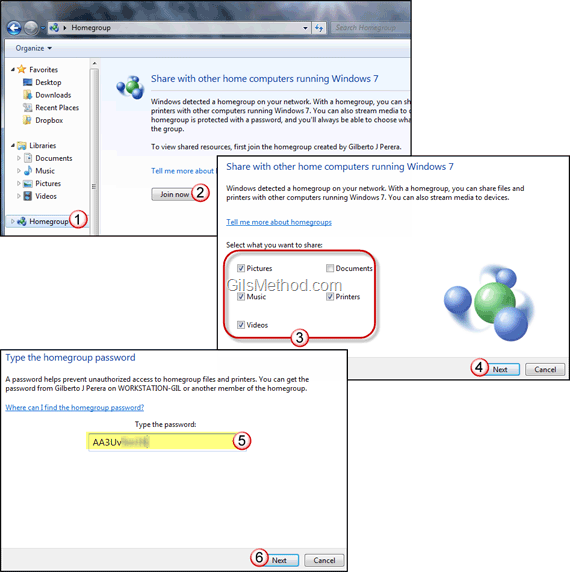
1. Open Windows Explorer and click on the HomeGroup icon located on the Navigation pane.
2. Because your computer is not part of an existing HomeGroup you will see the following message, “Share with other computers running Windows 7.†Click on Join Now.
3. Select the Libraries you wish to share by adding a checkmark to each.
4. Click Next to proceed.
5. Enter the HomeGroup password you originally obtained when you created the HomeGroup.
6. Click Next to proceed.

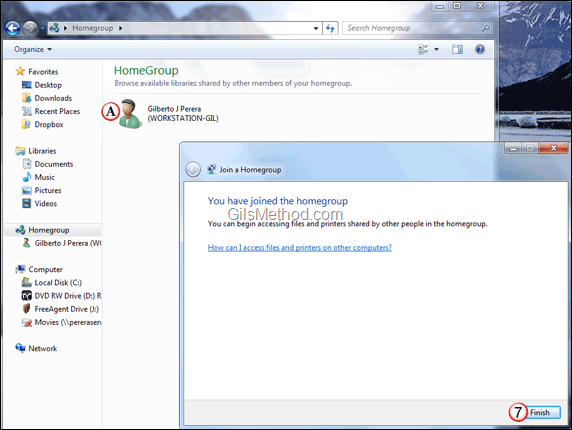
7. Click Finish to close the Join a HomeGroup setup.
A. You will notice that when you open HomeGroup the computers in the HomeGroup will be available. Just double-click to open so that you can access the files and printers shared by the computer.
How do you like using HomeGroup with Windows 7? Have any tips to share? Please use the comments form below.


