If you’re not a fan of the HomeGroup feature in Windows 7 and are looking for a way to share a printer with other computers on your network, this is the guide for you. In this guide I will show you how to share a printer installed on your Windows 7 computer with other computer users on the network. In this specific guide I will be using a network printer installed on my computer, the same instructions will apply to a printer that is installed via USB directly to the computer. If you have any comments or questions please use the comments form at the end of the article.
Software/Hardware used: Windows 7 Ultimate and HP Photosmart C7280 AIO Printer.
How to Share Printers in Windows 7

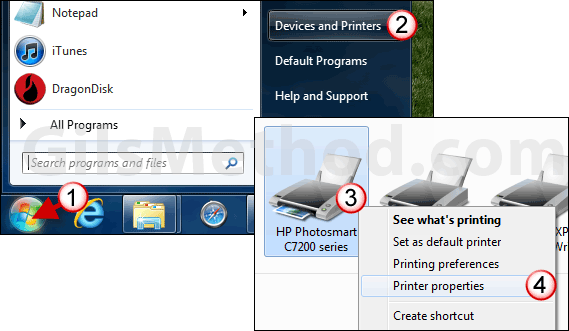
1. Click on the Orb to open the Start Menu.
2. Click on Devices and Printers.
3. When the Devices and Printers window opens right-click on the printer you wish to share.
4. Click on Printer properties from the menu.

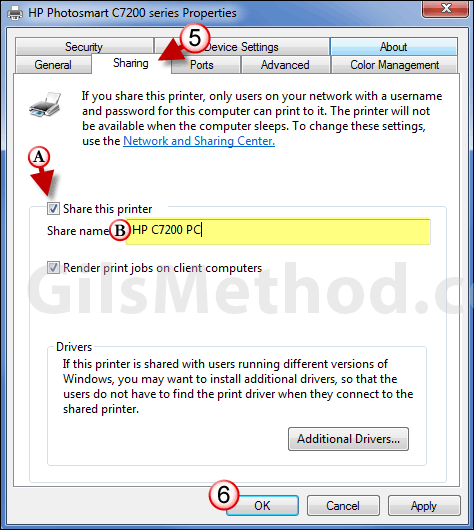
5. When the printer’s Properties window opens click on the Sharing tab.
A. Check Share this printer.
B. Name the printer.
6. Click OK to save the changes.
Note: Your printer is now shared on your network. The computer sharing the printer must be on for the printer to be accessible to other computers or devices on the network.
If you wish to unshare the printer all you have to do is repeat the steps above and uncheck Share this printer. Click OK to save the changes.


