How many times have you worked on group presentation and found yourself lost? I know I have, specially when several team members are working on it and presenting together. In PowerPoint 2010 you can pretty much say goodbye to that problem. The Office team at Microsoft has introduced a feature in PowerPoint 2010 that allows you to group slides into sections, in the group scenario I mentioned above this can help in sectioning of the slide show to specific persons so that there is no confusion as to where one part begins and the other ends. In the how-to below I will show you how I used this feature to section off a slide show I created a while back while working on my Six Sigma certification.
If you have any comments or questions, feel free to join the community and ask questions.
Create New Section
To create a new section in PowerPoint 2010 follow the instructions below.
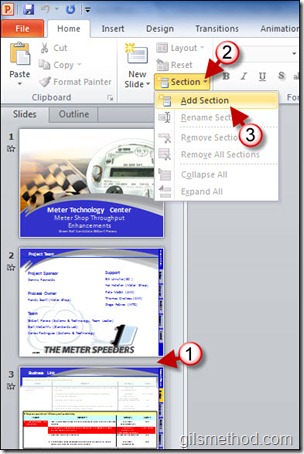
1. Click on the area between the slides you wish to separate in the slide sorter
2. Make sure that the Home tab located in the Ribbon is active and click on the Section button.
3. When the menu appears, click on Add Section.
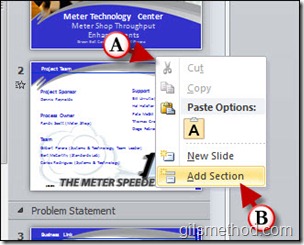
Note: You can also use the method below to add sections to your slides.
A. Right-click on the space between the slides you wish to section off.
B. Click on Add Section from the menu.
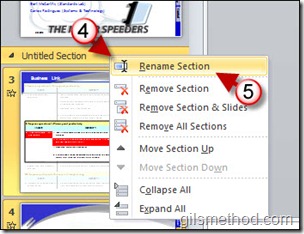
After the section is created you will notice that it will appear as a bar dividing the slides where you initially indicated. The default name for the section is Untitled Section. All of the slides after the section name will be included within that section.
4. To name the section, right-click on the section.
5. Choose Rename Section from the menu.
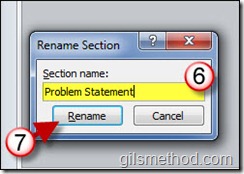
6. When the Rename Section box appears, enter the name you wish to use.
7. Click Rename to save the changes.
Collapsing and Expanding Sections
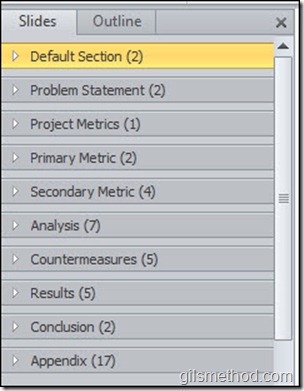
Once you’ve created all of your sections and want to navigate your slide show you have the option of collapsing and expanding the sections. See the example below.
1. Right-click on a section.
2. Click on Collapse All to collapse all of the sections.
When all of the sections are collapsed you will notice that the section name is followed by the number of slides within the section.
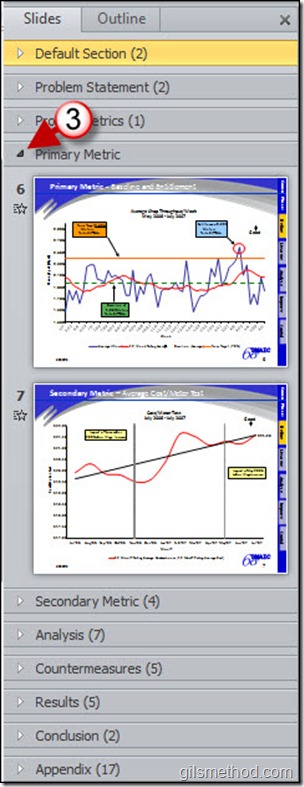
3. If you wish to work on the slides within a specific section, just click on the small arrowheadpreceding the section name to expand or collapse that specific section.
Note: You can collapse and expand as many sections as you want without regard for others.
Moving Sections Around
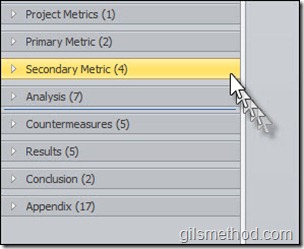
There are two methods to move sections around, the first can be accomplished by simply clicking and dragging the sections to the desired location. The second method can be found below.
Method 1 – Click and Drag
Simply click and drag the section to the location you wish.
Method 2 – Context Menu
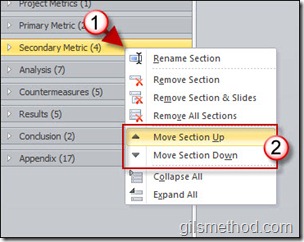
1. Right-click on the section you wish to move.
2. Choose the direction you wish to move the section to;
- Move Section Up or
- Move Section Down

