If you have a ton of PDF’s you want to move back and forth between your computer and the iPad, you will soon find that the new File Sharing feature in iTunes can be tedious and time consuming when working with multiple files. Say you have an entire directory of PDF’s you want to transfer from your computer to the iPad, how long will that take one file at a time? Luckily the GoodReader App I’ve been writing about (and my favorite PDF viewer for the iPad) has a feature that allows you to connect to your iPad via Wi-Fi as if it were a network drive, which in turn will allow you to seamlessly transfer PDF’s to and from your iPad. The guide below will show you how to set up this feature and how use it.
Note: The following guide assumes you have a wireless network and that both your iPad and computer are on the same network. You can also accomplish this via an ad-hoc network – more on that in a later post. You must have GoodReader installed on your iPad for this to work. I used Windows 7 in this tutorial.
Do you own an iPad? You might want to look into protecting your investment with invisibleSHIELD screen protectors. If you need any help or have questions please post them below.
Prepare the iPad for Wi-Fi Transfers
Make sure that your iPad is connected to the wireless network before proceeding.
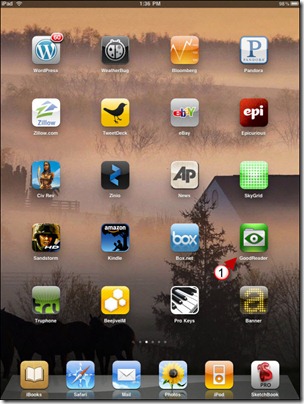
1. Tap on GoodReader in the Home Screen.
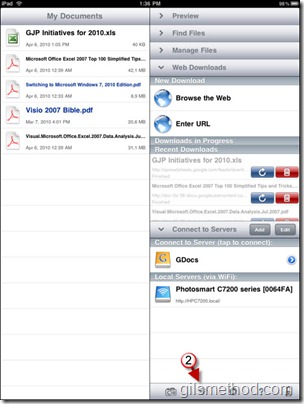
2. Tap on the Wireless icon located on the lower portion of the screen.
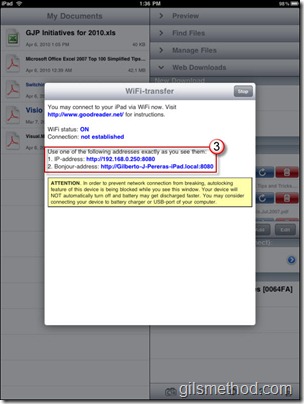
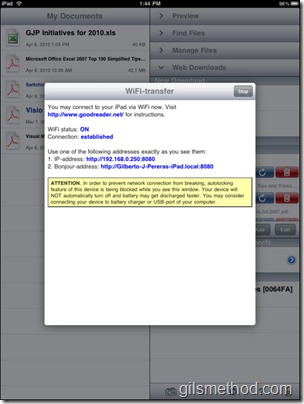
3. Copy down this information as you will need it in the following section.
Note: Since this tutorial covers the PC, use the first Address.
Prepare PC for Wi-Fi Transfers
Return to your PC so that we can connect to the iPad.
(Click on Images to enlarge)
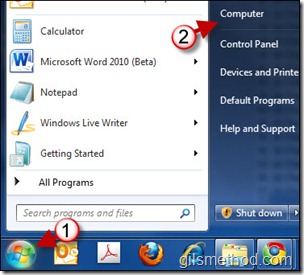
1. Click on the Orb to open the Start Menu.
2. Click on Computer.
3. When the Computer window opens, click on the Map network drive button.
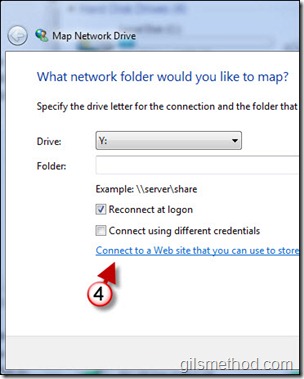
4. Click on the Connect to a Web site that you can… link.
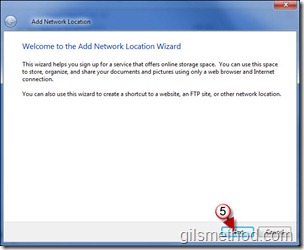
5. When the Wizard opens, click Next.
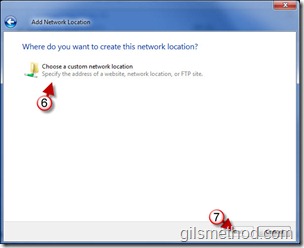
6. Click on Choose a custom network location.
7. Click on Next.
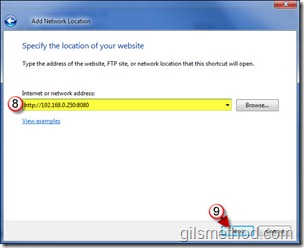
8. Enter the address from your iPad (the address from Step # in the Prepare the Ipad section above).
Should be http://xxx.xxx.x.xxx:xxxx
9. Click Next to continue.
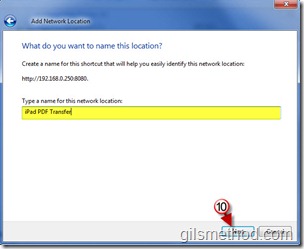
10. Name the connection and click Next to proceed.
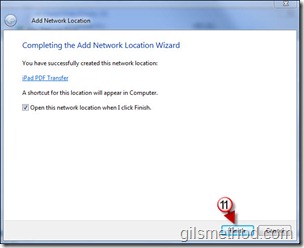
11. Click Finish to complete the setup.
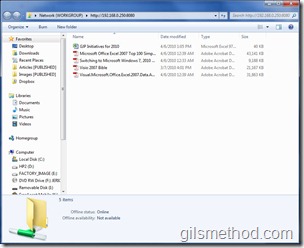
You should now be able to see the contents of your iPad.
Note: You will only be able to view the files that GoodReader has access to on your iPad.
When you return to your iPad, it will show that the connection is Established.
When you browse to Computer, you will find the newly created connection listed under Network Location.
Now you’re ready to transfer files from your computer to the iPad using Wi-Fi.
Note: If you have a DHCP server running on your router, you may have a different IP address the next time your device connects to the network. If this occurs the link you just created will not work because it will be looking for IP Address A and your iPad would have gotten another IP address B. To prevent this from happening you can follow this guide to reserve IP addresses with D-Link routers.

