Microsoft has done quite a bit to keep us from ruining our Windows installations. In doing so it has deployed several tools like User Account Control, the need for Elevated Command Prompts, and file ownership, among other things. Having ownership over a file or folder allows users to modify that specific item however they wish. So why would you need to modify a file? In some cases programs or tweaks require that changes be made to a specific file that you do not own. This requires assigning ownership of that file to your user account so that the file can then be modified.
The how-to below will walk you through the steps necessary to change the ownership of a file as well as how to locate and add users that may not appear in the Change owner to list.
If you have any comments please post them below or if you have any questions visit our forums.
Note: I used Windows 7 Ultimate in this tutorial.

1. Right-click on the file whose ownership you wish to modify.
2. Select Properties from the menu.
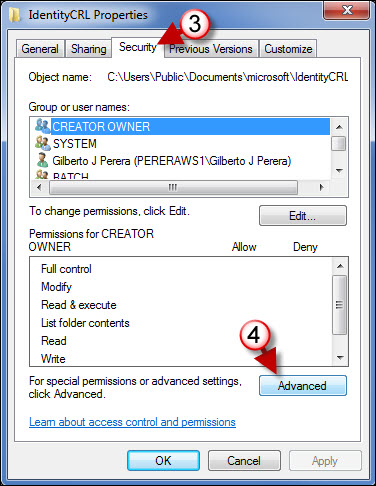
3. When the Properties window opens, click on the Security tab.
4. Click on the Advanced button.
 ‘
‘
5. The Advanced Security Settings window will open. Click on the Owner tab.
Note: The current owner of the file is displayed under Current Owner.
6. Click on the Edit button.
Note: Depending on your security level, you may be prompted by User Account Control about proceeding or requiring the appropriate credentials.

7. If the owner you wish to change to is listed in the Change owner to list, then select the new owner.
8. Click OK to save the changes.
If the Owner you wish to assign is not listed, then follow the steps below to locate the new owner and add it to the list.
a. Click on Other users or Groups.
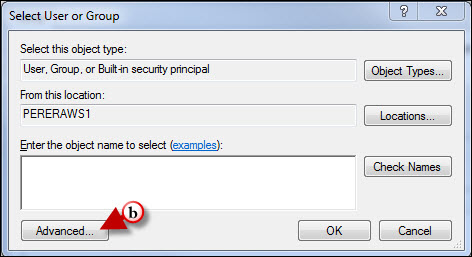
b. When the Select User or Group window opens, click on Advanced.
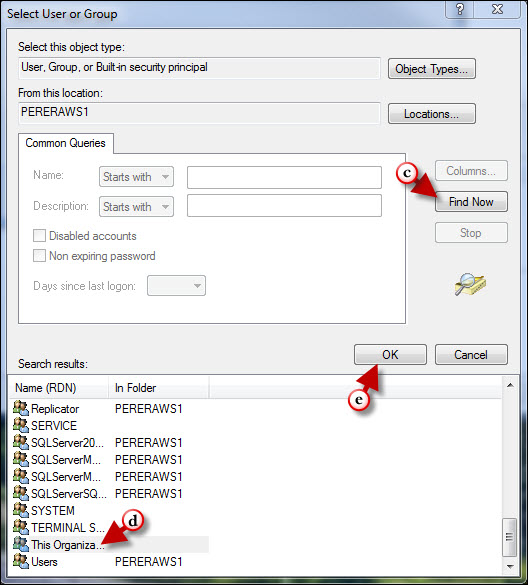
c. Click on the Find Now button to list all available users.
d. Select the user from the list.
e. Click OK.
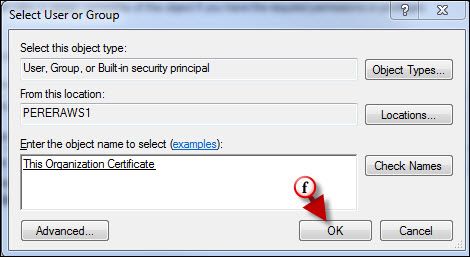
f. You will be brought back to the Select User or Group window. Click OK to close it.
Note: The user you selected in the previous screen should be listed in the Enter the object name to select text box.
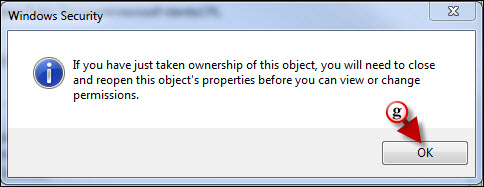
g. Click OK to acknowledge the prompt.

The user you selected and added to the list should now be listed as the owner.
