Do you use VirtualBox in more than one computer? Wouldn’t it be nice if you could share all of your virtual machines between your notebook and desktop? A couple of changes to default directories in VirtualBox will allow you to do just that. VirtualBox allows users to customize the default storage locations for virtual machines and their associated virtual hard disks. In this how-to I will show you where those settings are and how to change them. When you are done with this tutorial you will be able to use your virtual machines on your notebook and desktop, provided they can access the same directory the VM’s are located and that you don’t try running a single machine simultaneously.
Before we get started there are several things we need to understand;
- The default directory for VirtualBox virtual machines and hard drives is – C:\Users\ %USERPROFILE%\.VirtualBox
- The Machines directory contains the XML files with the configuration options for each of your virtual machines. When you move the default directories you will have to edit the XML file to update the several parameters or just run the Create New Machine Wizard and attach the appropriate virtual hard drive to it. The latter will recreate the XML file on the new directory and keep the other intact.
If you have any comments please post them below or if you have any questions visit our forums.
Note: I used VirtualBox 3.1.4 in this tutorial.
Open VirtualBox to get started.

1. Click on File to open the menu.
2. Click on Preferences…
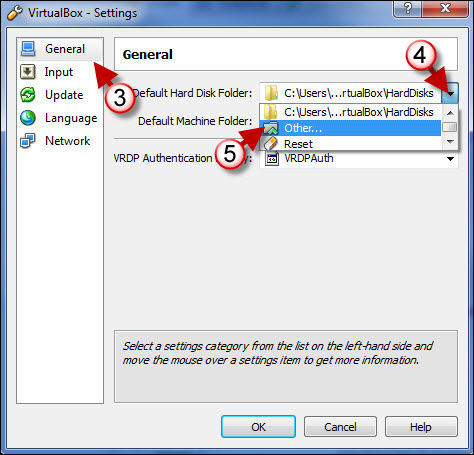
3. When the Settings window opens, make sure that you are in the General area (pane to the left).
4. Click on the small arrow to open the menu to choose the Default Hard Disk Folder.
5. Click on Other from the menu.
 ‘
‘
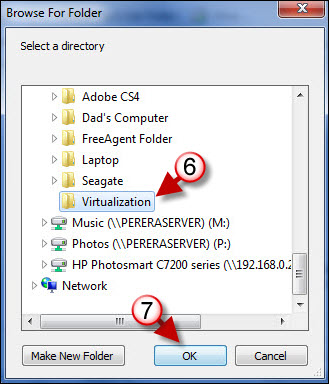
6. Locate and choose the folder you wish to use for Virtual Hard Disks.
7. Click OK
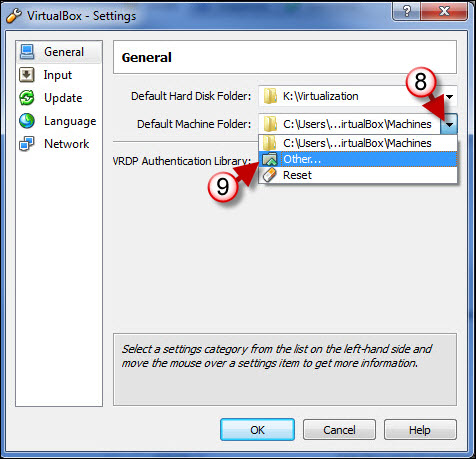
8. When you return to the Settings window, click on the small arrow to expand the Default Machine Folder.
9. Click on other and locate and choose the folder you wish to save the Virtual Machine files to (repeat steps 6-7).
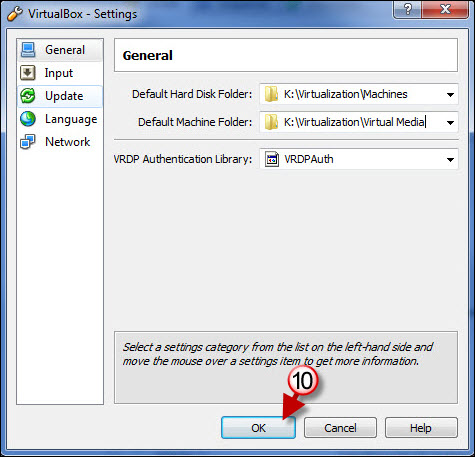
10. When you are done customizing the directories, verify that they are correct and click OK to exit the Settings window.
