If you own more than one Mac or PC in your home network and your printer does not support networking you will need to share that printer using one of your computers. If you want to share the printer using a Windows PC, follow these instructions. If instead you wish to use your Mac as the computer sharing the printer then the instructions below will suffice. In the guide below I will show you how to share a printer installed on your Mac with other computers on the network. In this specific guide I will be using a network printer installed on my Mac, the same instructions should apply to a printer that is installed directly on the Mac. If you have any comments or questions please use the comments form at the end of the article.
Software/Hardware used: Mac Mini running Mac OSX SL and an HP Photosmart C7280 AIO Printer.
How to Share Printers in Mac OSX
Before proceeding with the instructions make sure that your Mac has a printer installed.

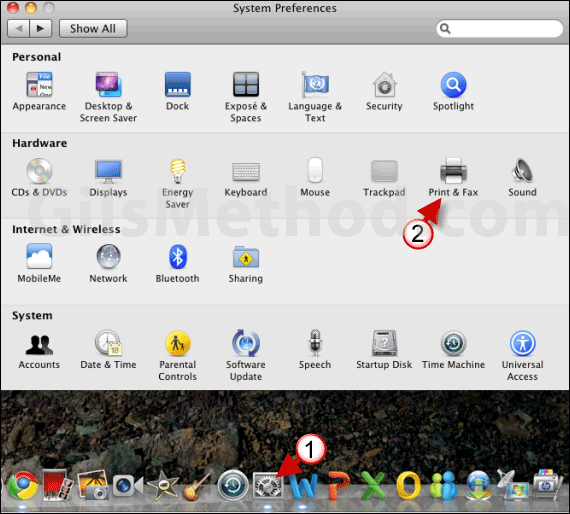
1. Click on System Preferences in the application Dock.
2. When System Preferences opens click on Print & Fax in the Hardware section.

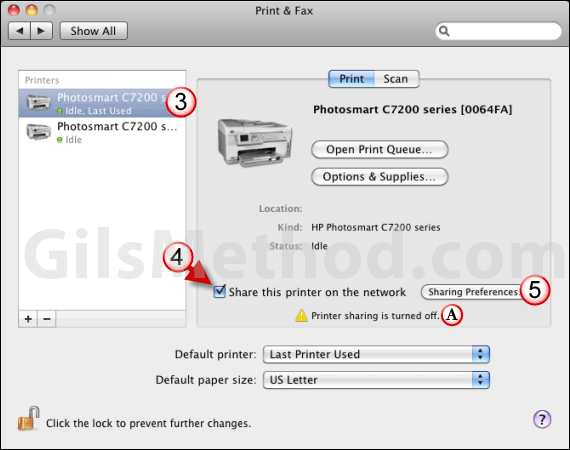
3. When Print & Fax opens click on the printer you wish to share from the Printer list.
4. Check Share this printer on the network.
A. If you see a warning stating that Printer sharing is turned off. Proceed to the next step, otherwise you are done!
5. Click the Sharing Preferences button to enable printer sharing.

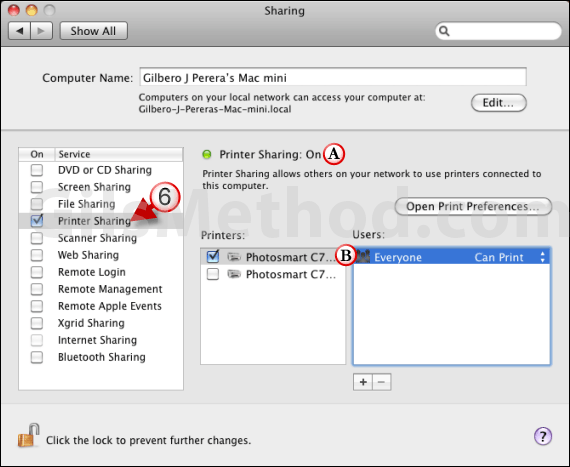
6. When Sharing opens add a check to Printer Sharing listed on the left of the window.
A. The Printer Sharing status should be green and On.
B. If you wish to specify who has access to the printer on your network you can set the printer and the users in this section. However if you are in a home environment and the network is secured, you shouldn’t bother with this.
To unshare the printer repeat steps 1-4 and uncheck Share this printer on the network.


